
Here at AMT Electronics, we are experts in all manner of electronic device repairs. This of course, includes repairs to iMac’s of all sizes. Look no further than AMT if you need an iMac repair.
Need your iMac screen repaired? We’ve got you covered.
Need to change the hardware around because its not performing as well as you want? AMT Electronics technicians will get that sorted for you at a great price!
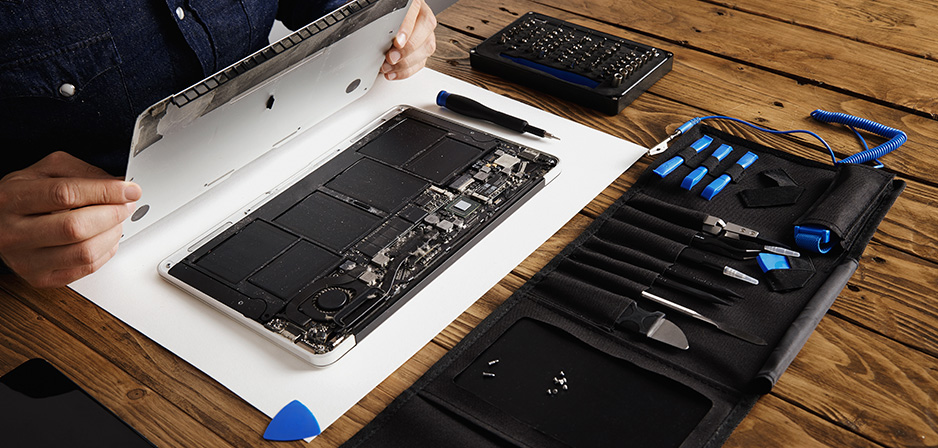
No matter what issue your iMac is having, for any iMac repair our team can sort it out for you at a very reasonable price. With 30 years in the business we know what to do, and how best to do it. Curious about this process? We’ve listed the most important steps below to provide you an understanding of this procedure, though we wouldn’t recommend you do it yourself of course. Keep in mind not all iMac’s are created equally and some require a much more delicate and intensive procedure, so make sure you know what model you have. The following procedure is only for those iMac’s with a magnetic glass panel as the newer ones use a different method of attaching the screens.
Step 1) Preparing the work area/setup
The first step in to setting up your iMac repair is of course, disconnecting it from power and any other external cables. It is highly recommended to place the iMac face up, on its back on a soft surface as this will help prevent a lot of potential issues once the screws have been removed. Once your setup is ready you can move on to the next step.
Step 2) Removing the front glass
The first step for any real work on the internals of an iMac involves removing the front glass, depending on your iMac model this is quite simple. For the iMac’s we are talking about, this procedure just requires you to pull off the glass as it is held on magnetically and is not attached to the display panel. For these iMac’s you can gently remove the glass by pulling it off and ensuring you place it in a safe location. This procedure is quite standard for the larger, older iMac’s with a thicker body.
This will give you access to the display panel of the unit. But don’t think the next step will be as easy, because now you need to start being really careful.
Step 3) Removing the display panel (screen)
Now that the (relatively) easy part is done, its on to the next step. To remove the display panel you will need to locate all the screws on the edge of the screen and remove these, making sure you do not mix up any screws of differing lengths (if applicable.) Keep in mind some screws may be under a cover or hidden, be sure that you’ve found all of them before trying to pull off the screen! But do not pull off the screen yet!
A good general practice tip is to keep every screw separate and only put the exact same screw back to where it was when re-assembling any electronic device.
Step 4) Disconnecting the internal cables
Once all the screws have been removed, you can gently and carefully pull the panel partially off to find the cables attached to the unit. You need to locate all of the cables attached to the display panel and carefully disconnect these before the full panel can be removed. There is more than one so don’t get ahead of yourself and damage the cables, make sure all of them are disconnected.
The first one should be a small cable near the top, the second one on the side which is the power connection and then a few more about half-way down near the middle. Of course your exact iMac may have more or less connections, so always double check to make sure all of them are disconnected before removing the panel completely as these cables can be permanently damaged very easily.
Once you are sure all the cables have been disconnected, you can pull the panel from the top outward and carefully lift it off the base of the iMac. This will give you access to the internals of the unit.
Step 5) Packing up the iMac
Once you’ve finished your work on the internals of the iMac, simply follow steps 1 to 4 listed above but in reverse. Gently place the display panel back on the iMac following the grooves on the base, reconnect all the cables, put all the screws back then place the glass back on and you’re done!
That marks the end of our guide for how to take the screen off an iMac and access the internals. Of course for any iMac repair we highly recommend you have the professionals at AMT Electronics do any repairs for you, but this guide will at least help you understand the procedure a bit more, and help you appreciate the delicate nature of electronic repairs just a little bit more.